Showing posts with label fabric flower tutorial. Show all posts

Monday, December 6, 2010

Floral Bib Necklace Tutorial

This one is similar to the fabric flower tutorial, but instead of sewing the flowers, we are going to hot glue them to make it easier :) This is what it is going to look like when you are finished. It only takes about 30  min once you have all the materials rounded up.

Materials:


  • Felt for bib base
  • Strips of fabric for flowers (about 12 x 1 inch strips for the big flowers, and 6 x .5 inch for smaller)
  • Hot glue/gun
  • Beads to decorate with
  • Ribbon Crimpers
  • Ribbon


First things first, You will need to cut out the base of the necklace that we will be gluing all the flowers onto. The best thing to use for the base is felt because it is usually thicker than fabric, and it won't fray so you won't have to sew anything (boo-ya). 


I wish I could give you a pattern for the base, but unfortunately I do not have a scanner so you will kind of have to wing it, like I did. First measure how wide you will want it, and how long. Then cut it into a shape similar to this (or however you want the base to look).


Next order of business is making the flowers. Decide where you want your first flower. This is important because you will build your necklace off of this flower position. (no pressure). Then, you make a hot glue dot where the center of the flower will be. You still one end of your fabric strip to the dot. Then you will take the rest of the strip of fabric and twist the fabric while wrapping it around the center. As you do this, continue to blue down the parts that you are twisting so as to secure the flower that you are making. Voila, you have one flower done. 


Then just continue to follow this process adding more flowers to the base. If you want to follow my pattern, I chose one main color (silky black), and then used two other fabric patterns to spice it up, but always made sure that I had more silky black than anything else. I did about 4 big flowers and then started making smaller flowers to fill in the gaps. 


Next, you add some beads. I picked a light pink pearl (not that you can tell with my point and shoot camera). 


We are getting ready to add the ribbon, but first you will want to secure the area that the ribbon is going to run through. Cut 2 small circles out of the left-over felt. Then place them on a "no-sew" iron-on adhesive. Iron them to the adhesive. After they are attached to the adhesive, cut around the circles, peel off the back and now iron your circle patches onto the back of the necklace where the ribbon will be. 


Ok, cut a hole where the patches are and run ribbon through (the ribbon should be about 24-30 inches long). 


Now, I am sure you don't want to be fighting 4 ribbon ends every time you wear your necklace, so to remedy that problem you can add a ribbon crimpers at the ends. You take a ribbon crimper, put the two ends of the ribbon into it, and then you fold the sides down onto the ribbon and pinch it shut with pliers. I like to add beads after just to dress it up a bit :)


You are done! Now go strut your stuff in your brand new bib necklace, while feeling accomplished because you made it yourself and it looks great!

Friday, October 22, 2010

Fabric Flowers Tutorial

I had a ton of fun with the tutorial of how to add lace to a cardigan, and I have seen friends who have already used this and they looked great! (Andrea, your cardigan turned out great!). So I have decided to do another how-to and this one if SOOO easy! Get ready for lots of fun reinventing something simple and turning it into something chic! (all these exclamation points, do you think I am excited about this one?)

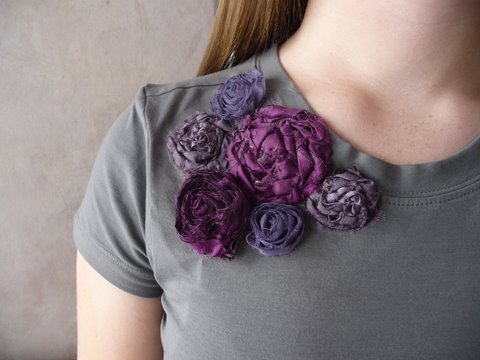
Ok, so to get you pumped I have added a couple of pics to show you what we are doing:


Have you guessed it yet? 

Fabric flowers! Ok, so this is so easy and I have done it myself to some of my tees and it only took 20 min and my shirt was ready to wear. 

1st Step:

You want to get a plain old tee, I personally am using one that I got from Gen-X in Utah. I got this tee thinking I could wear it with anything, but then found that I wasn't. They are super cheap there if you don't have one already, or they have some at Hobby Lobby. I am hoping, however, that this tutorial will help you just add to something you already have :)

2nd Step: 

Round up your materials. You will need:


1.  Strips of fabric to make the flowers (this will depend on how big you want them. For my little ones I used 1 inch x 6 inch fabric pieces. 
2.  A sewing needle and thread to match flower fabric
3.  Scissors
4.  No sew heating bond (optional). 

3rd Step:


Ball up fabric, and place that ball where you want the center of the flower to be. Sew up through the shirt and back down through the fabric to secure the center of the flower. 

4th Step: 


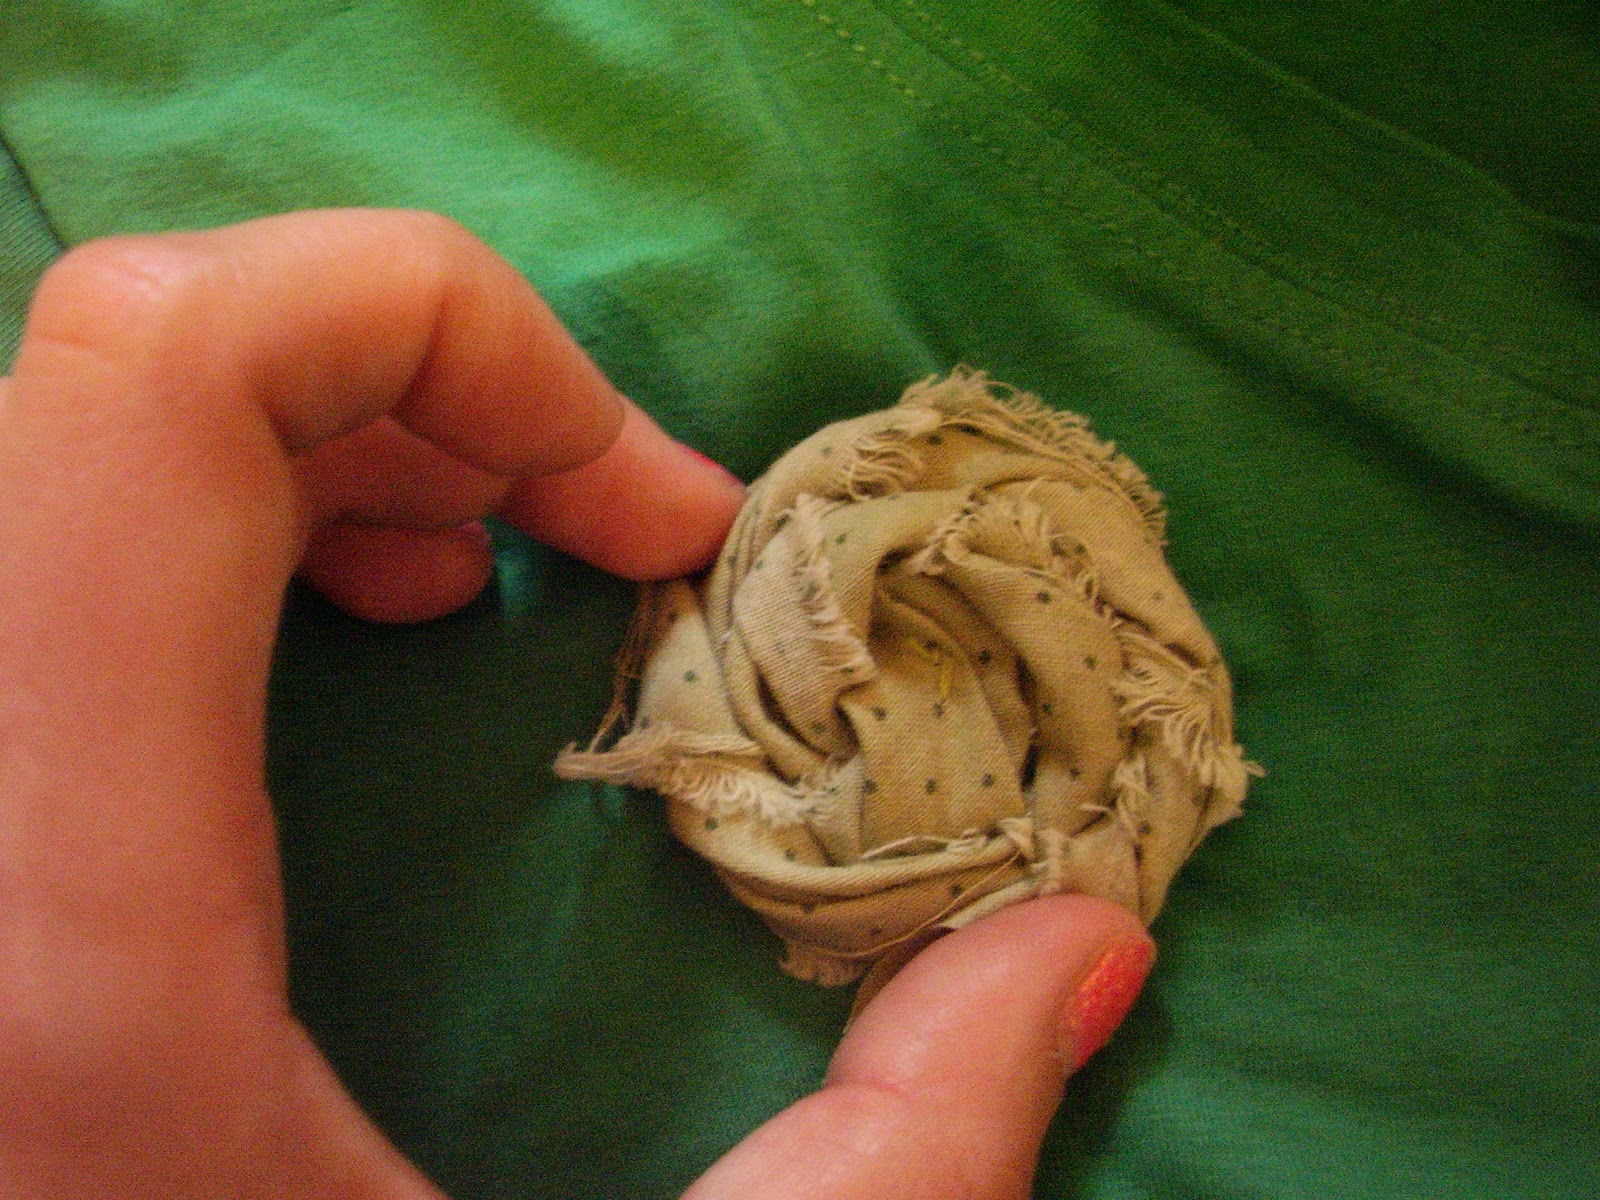
Twist the fabric and then wrap it around the center of the flower. 


6th Step:


Once you have wrapped all of the twisted fabric around the center, sew up and down the same way you did the center and secure the rest of the flower. I usually do this 5 or 6 times all around the flower to secure it. 


Voila! One flower done :)


Now that you know how to make one flower you can continue to add them to the shirt in a cluster until you have reached your desired look. 


7th Step: (this one is optional).

I like to take a couple pieces of the leftover strips you haven't used for flower and use them to cover up the thread on the inside of the shirt. 

Take some "No-sew bond" (you can get it anywhere, I get mine from walmart. 1 yard for 2 bucks). Follow the instructions of how to bond fabric to fabric. 


Use a clothes iron to bond the fabric to the No-Sew Bond. 


Peel the protective paper off the back of the sealant. 


Now place the sealant side of the fabric onto the shirt, over where the thread is you used to sew on the flowers. 


It isn't very pretty, but I like to do it so that I do not have to worry about the thread coming loose in the washing machine. 


You are done! Hooray! See it isn't too difficult. Here is my finished product:


Now your simple tee is simply chic-i-fied. Have fun wearing what feels like a new shirt!